Remember when you were young you shone like the sun.
— Pink Floyd
Let there be lights!
Dark Times
Once a year, I volunteer at a scouts camp where me and a friend assist the troop leaders in running the camp. My friend and I focus mainly on the house keeping chores like tidying up the camp site and making sure dinner is served at the right time. This way the troop leaders can focus on the kids.
During the camp, which lasts four days, we live - of course - in tents. We have this large (50 square meters) tent that serves as our main shelter. It’s basically our combined living room and kitchen. Its a cozy place, filled with foldable tables and benches, an improvised kitchen and an assortment of camp gear and play things for the kids.
And at night… it get’s very dark in there…
I got tasked to find a solution to that darkness. I could of course have ordered a simple set of lights from the ubiquitous Chinese vendors in cheap, crappy electronics. That would have saved me a lot of time and money. But then again, what would be the fun in that? I could also have built a very simple thing with off-the-shelve color-changing LEDs, and I actually considered doing just that at first. But… See argument above. So I decided to go for a hand-built, custom design.
In this series of blog posts I will document both the design and the build process of the project.
The plan
Okay, so we need lights. They will have to both functional and, naturally, cool. And since there’s no mains socket out there in the great outdoors, they’ll have to be battery powered.
Here’s the wish list:
- Down lights for functional lighting
- Mood lights in configurable, changing colors
- Dimming
- Powered by batteries or an optional mains adapter
- A (wired) remote control with buttons and LEDs
Also, as nice to have: a built-in microphone for beat detection or other audio-controlled effects.
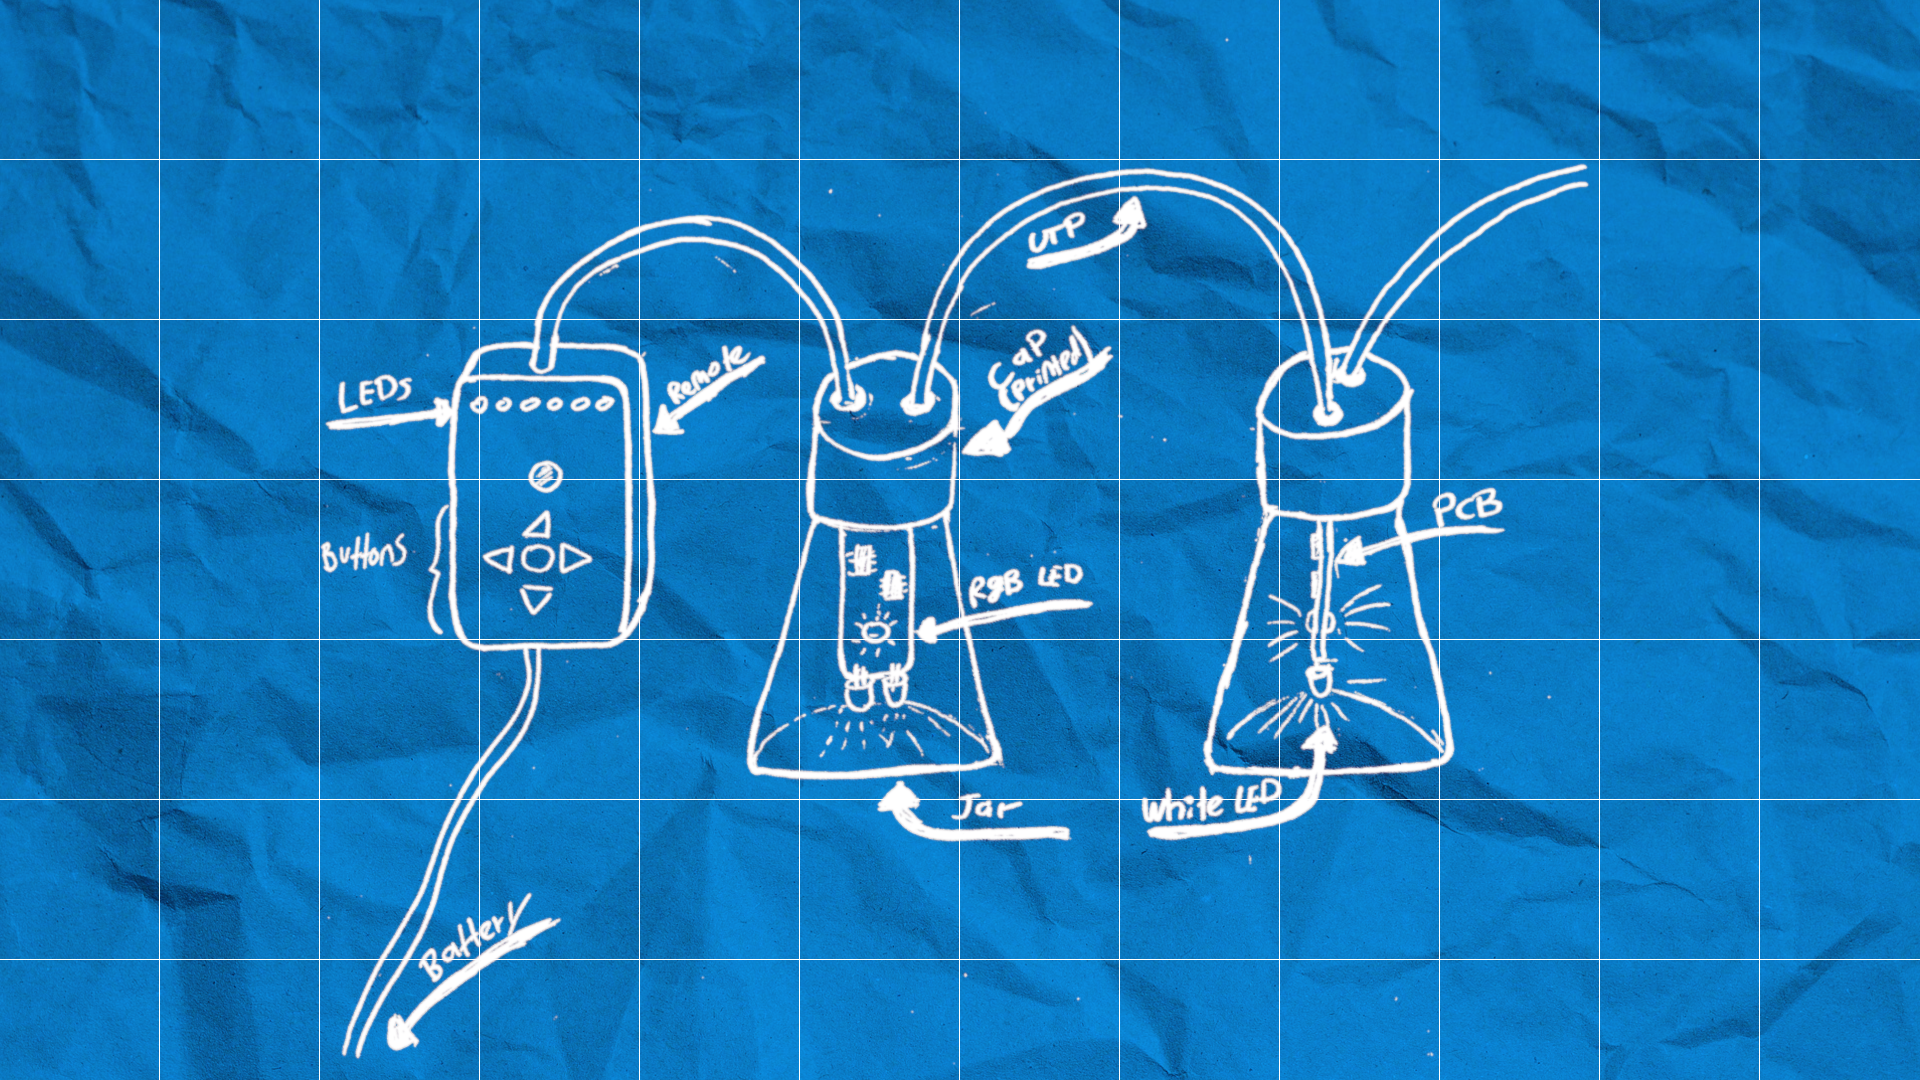
A block diagram of the system would look something like this:
 Blocks
Up-cycling (well, partly…)
I’m a big fan of re-purposing materials and I tend to collect loads of things for potential future projects. This magpie-like behavior has lead to a nice collection of materials to choose from. On the downside, my house is fast running out of floor space.
Obviously, the lights will have to go in some transparent enclosure. I found just such a thing in the form of small glass spice jars. Using these jars will save them from the bin. As an added bonus it save a lot of parts that would otherwise have to be 3D-printed. Of course I did not already have all the spice jars I needed for the project, but lets ignore for now all the extra powdered garlic I had to buy. And eat. (I apologize for the inconvenience, dear friends and colleagues).
 Spicy up-cycled enclosures
The jars alone will not be enough for a proper enclosure. There will be quite a lot of 3D-printing involved to actually mount the PCBs inside them and to attach everything to a rope.
For the wiring I found a nice, 10 meter long UTP cable at the second hand shop. But I’m afraid that’s where it stops when it comes to re-used materials.
What’s next?
So, what’s up next? Here’s a summary of what’s coming:
Let’s start with the best part: Circuit boards! Lots of them. The design consists of two different boards. One low cost LED board with a linear voltage regulator, a microcontroller, serial receiver and LEDs. The second board will be the controller, with a simple user interface and power supplies for both the control logic and the external LED boards. The show will be run by a (more powerful) microcontroller in this remote control unit.
The making of the boards will then be covered. Spoiler alert: this involves a lot of soldering and testing. And some rework as well.
Then there are the enclosures. All parts but the jars will be 3D-printed. It has been an interesting journey get to a design that’s both manufacturable and easy to assemble. Not in the last place because I’m fairly new to the 3D-printing game.
To get this contraption to actually do some work there will also be a fair amount of coding to be done.
I will cover the whole process of the LED units (boards, enclosures and firmware) first and will then proceed to the controller and everything involved with that. Next up in the series: The LED board design!